Discovering the Best Lash Lift Kits for Home Use: My Personal Ranking
Do you dream of beautifully curled lashes that impress with every blink? If the answer is yes, then you’re in for a treat! Lash lift and lamination have gained immense popularity recently, transforming at-home beauty routines everywhere. And the best part? You can now do them by yourself!
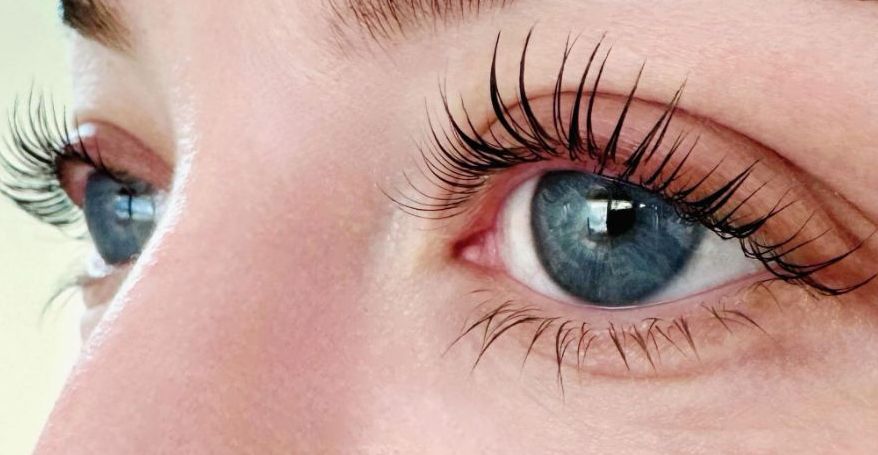
After experimenting with different lash lift kits on the market, I’ve discovered which ones genuinely give that WOW effect. Below is my personal ranking of the best lash lift and lamination kits for home use, so you can achieve professional results without leaving home. Whether you’re a beginner or have some experience with DIY beauty treatments, I’ve compiled my top choices for gorgeous lashes right from home.
What Exactly Are Lash Lift and Lamination?
Before we dive into my product reviews, let’s talk a bit about what lash lift and lamination are. Lash lift focuses on curling your natural lashes right from the roots, creating the illusion of longer, fuller lashes without any extensions. It’s like giving your lashes a mini makeover, making your eyes look wider and more defined.
Lash lamination, on the other hand, goes beyond just curling. It involves nourishing and strengthening your lashes with a keratin coating, leaving them healthier, shinier, and more voluminous. With both methods, you’ll have beautiful, curled, and natural-looking lashes that last up to several weeks. So, ready to find out which kits made the cut?
My Top 5 Lash Lift Kits for At-Home Use
When reviewing each kit, I evaluated them based on ingredients, kit contents, ease of use, durability, and availability. Here’s my carefully curated list, starting with my absolute favorite!
1. Nanolash Lash Lift Kit – My Go-To Favorite for Long-Lasting Results
The Nanolash Lash Lift Kit has become my absolute favorite for achieving the perfect lash lift. It contains everything needed to curl, lift, and nourish lashes, so you get both the visual effect of a professional treatment and long-term lash care.
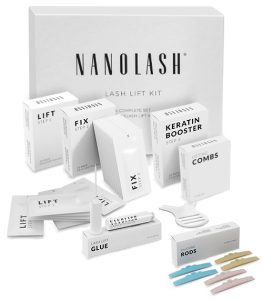
What’s Inside?
The kit includes the essentials for performing the DIY lash lift:
- Activator
- Neutralizer
- Keratin Conditioner
- Glue
- Three pairs of silicone rods
- Three lash combs
All the products come in convenient single-use sachets, so you get just the right amount for each application. Plus, there are ten sachets of each product, meaning this kit can last for up to ten uses – a fantastic value for money!
The Nanolash formula includes keratin and botanical oils, both known for their lash-strengthening and conditioning properties. My lashes feel incredibly soft and healthy after each use, and because the ingredients are natural, it’s gentle enough even for my sensitive eyes. The effect lasts up to eight weeks, and I’ve never had to touch up between applications.
Nanolash Lash Lift Kit is easy to find in popular beauty stores and online. It’s attractively priced for the quality and durability of the results, making it an excellent investment for any lash lover.
2. Elleebana Lash Lift – Professional-Quality Results at Home
Next up is Elleebana Lash Lift, a kit widely respected by both professionals and at-home users for its consistent, high-quality results. Known for creating a natural lift effect that lasts, Elleebana has made a name for itself as a top choice among beauty salons.

What’s Inside?
- Activator and Neutralizer Sachets
- Glue with a Brush
- Silicone Rods
- Lash Lift Applicator and Brush
- Foam Remover
This starter kit is well-rounded and packed with professional-grade items to help you achieve salon-quality results at home. The lift lasts 6–8 weeks, which is impressive for a DIY kit.
One thing I noticed is that Elleebana’s kit takes about 20 minutes per session, making it ideal if you’re short on time but still want a long-lasting lift. However, it does require a bit more technique and precision, especially if you’re new to lash lifting. The glue is slightly stronger than others, ensuring the lashes stay put on the silicone rods during the process. Although it’s more expensive and can be tricky to find in some areas, it’s definitely worth it for those seeking a salon-standard experience at home.
3. RefectoCil Eyelash Lift – Quick and Lasting Lift in Minutes
If you’re looking for a lash lift kit that’s both quick and durable, RefectoCil Eyelash Lift is an excellent choice. This kit stands out for its speed, as the DIY lash lift process only takes about 13 minutes.
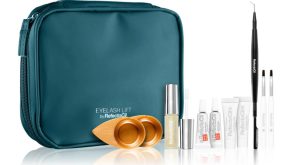
What’s Inside?
- Three pairs of lifting tubes
- Lash perm tubes (two 3.5 ml tubes)
- Neutralizer tubes (two 3.5 ml tubes)
- 4 ml Glue
- Wooden Pick
- Two Mini Bowls
- Two Brushes
This is my go-to for days when I need a quick lash lift. The entire process, from start to finish, is under 15 minutes, and I love that I can see the effects for up to six weeks! The ingredients are gentle, which is a big plus for sensitive eyes, and it’s easy to find online. This kit is perfect for beginners and anyone who wants effective, fast results with minimal fuss.
4. Fleeky Lashlift Kit – Simple and Perfect for Beginners
For those just getting into the world of DIY lash lift and lamination, the Fleeky Lashlift Kit is a fantastic starting point. Its straightforward application makes it ideal for beginners who want to try the lash lift without the stress of complicated instructions.
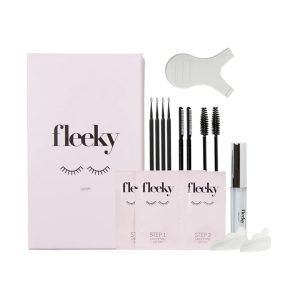
What’s Inside?
- Lifting Lotion
- Neutralizing Lotion
- Glue
- Silicone Rods
The Fleeky kit gives a soft, natural curl that’s noticeable but not overwhelming, making it great for everyday wear. While the lift isn’t as intense or long-lasting as some of the higher-end kits, it still offers a subtle effect that replaces the need for mascara on most days. It’s also one of the most affordable kits, so if you’re testing the waters with at-home lash lamination, this is a low-commitment, wallet-friendly option that’s widely available.
5. Thuya Lash Lift Kit – Professional, Nourishing, and Long-Lasting
The Thuya Lash Lift Kit is perfect for anyone wanting a high-end, salon-like experience at home. Known for its rich, nourishing ingredients like keratin, this kit not only lifts but also strengthens and protects your lashes.
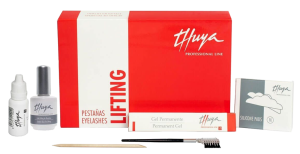
What’s Inside?
- Lash Lifting Glue
- Permanent Gel
- Neutralizer
- Rods
What sets Thuya apart is the quality of its ingredients. The formula is designed to strengthen and condition the lashes while lifting them, so you end up with lashes that feel as good as they look. Although it’s a bit pricey and not as easy to find, the results last up to eight weeks, making it worth the investment for those wanting a premium at-home lash lift experience.
DIY At-Home Lash Lift and Lamination – my verdict and tips
After trying various lash lift kits, I can confidently say that the Nanolash Lash Lift Kit takes the top spot for ease of use, affordability, and results that last. For those who want to dive deeper, Elleebana and Thuya offer professional-quality options, while RefectoCil and Fleeky provide fantastic choices for time-conscious and beginner users alike.
Here are five key tips to ensure your DIY lash lift and lamination are successful:
1. Prep Your Lashes Well
- Start with completely clean, oil-free lashes. Use a gentle lash and brow shampoo or micellar water to remove any makeup, natural oils, or residue. Clean lashes provide a better base for the adhesive and lifting formulas, helping the products work more effectively.
2. Take Your Time with Rod Placement
- Choose a rod size that matches your lash length and desired curl type (smaller rods create a tighter curl, while larger rods create a softer curl). Align it carefully along the lash line, and ensure it’s snug without slipping. A secure rod placement helps prevent uneven curl.
3. Apply Adhesive Evenly
- Apply a small amount of glue to the rod. Brush the lashes onto the rod gently, keeping them separated. Avoid using excess glue, which can cause clumping. Using a clean spoolie, guide the lashes up onto the rod to ensure they curl uniformly.
4. Watch the Timing
- Timing is crucial to avoid over- or under-processing. Follow the kit’s instructions closely, using a timer to ensure precise timing for each solution (typically 8–12 minutes per step). Adjust only slightly if needed based on your lash thickness, but avoid exceeding recommended times to prevent damage.
5. Skip Moisture and Makeup for 24 Hours Post-Lift
- After your DIY lash lift, avoid water, steam, and eye makeup for at least 24 hours. This allows the lift and lamination to fully set. Exposure to moisture too soon can weaken the lift effect, so wait before showering, applying eye creams, or wearing mascara.
These steps will help you achieve beautiful, lifted lashes that last!

